Posts

Showing posts from March, 2019

Creepy Cute Chronicles New Monthly Exclusive

Image
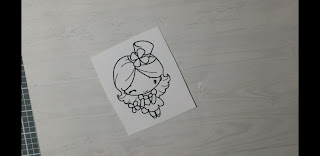
Hello everyone! Eny here with another OddBall Art stamps project! Today I want to share with you what will be the Monthly exclusive digital stamp set  Every month,  subscribers will receive a digital stamp set,  that cant be purchased from the shop. For just $15 , you get a full year access to all previous Creepy Cute Chronicles freebie images, and also exclusive content!  You can find all the details on the website here The month of April will feature this adorable Bat Girl. I decided to pair her with one of the newer releases IMG#524 Creepy Cute Girl with Camera For a full tutorial on the coloring process for these images , you can check out my YouTube channel !  Remember you can use coupon code Eny1 to get one free image with the purchase of two!  Happy crafting!  Eny 

Holly in the Sky|OddBall Art Project

Image
Hello everyone! Today I wanted to share this ethereal, whimsical card I created using OddBall IMG350 Big Eye Girl Fairy Happy Holly.  I begin my project by created a colorful background , using a cloud border stencil and Distress Oxide inks Squeezed Lemonade, Spun Sugar and Broken China.  I will also add some circle details, using a stencil. I wanted it to have a look and feeling that she lives on a planet with three moons. I made sure to use the same distress Oxide colors to create the illusion.  I decided to color my image using Prismacolor Premiere colored pencils.  Once the image is complete, I proceeded to fussy cut her and adhere all my components together. Not before adding some extra sparkle with Ranger Ink Peefevr Pearls.  I'm so happy with how this images turned out, and I hope you will join me on my YouTube channel for a full tutorial and details. You can find this and all other images by visiting the OddBall website. Make sure to use coupon code En

Watercolor Card feat OddBall Art

Image
Hello everyone!  Today I want to share with you this fun watercolor card I creates using IMG#376 Tustic Forest Birch Trees  and IMG#359   Creepy Cute Girl Dread Head  For this card, I used the Kuretake Watercolor Basics Palette. I made sure to print on watercolor cardstock and let dry a bit before coloring the images. The full tutorial can be found on my YouTube Channel. You may find these and many more images at the OddBall Art website . You can use coupon code Eny1 to get one FREE image with the purchase of two.  Happy crafting! Eny 🥰

Paper Basket|Happy Mail and Gift Idea

Image
Good morning!  Today I will be sharing with you this quick and easy way of creating paper baskets! No svg files or templates required for this one. This particular project was inspired by a blog post from Merriment Designs from 2014. I adjusted measurements so everything is in inches, and also made the trimming and cutting process a bit easier.  First you will need a 10x12 piece of cardstock.  Can be patterned or solid colored. I went for patterned to cut the middle man.  You want to score at 4 and 8. Rotate and score again at 4 and 8. You can also score at 3 and 7, depends on how big and wide you want the overall basket to look  On the 12 inch sides of your paper, you want to score at 1,2,3 and 9, 10, 11, drawing the line up to the main score lines you did (4,8). These inch strips will only be on the four corners of your paper.  Cut each scored line, only going up to the 4,8 score line. No more, no less. This will give you flaps or strips that you will use t

Art Journal Page feat. OddBall Art Stamps

Image
Good morning! Today I am finally sharing another process video, featuring IMG#398 Big Eye Girl "Say What You Want" Gabby ! She is beautiful and with plenty of surface space to color and get creative!  I begin my project by coloring the image using Spectrum Noir Alcohol Markers.  Colors used for this image are the following: Skin: FS2 FS3 FS6 TN2 Hair: BO1 BO2 BO3 Lips: BO4 Tiny Heart: CR11 EYES: IB2  With my image fully colored, I will begin assembling and coloring all the components for my background.  I grabbed and wonderful Poppy stamp set from Stampendous Stamps,  and stamped both images on Neenah White Cardstock with some Memento Tuxedo Black ink.  To color up my flowers, I'm using Ditress Oxide Inks Spun Sugar, Worn Lipatick and Candy Apple.  I make sure to blend colors together, creating a gradient effect, going lightest to darkest.  For my art journal page, I added some greenery using the same stamp set, and blending so

Mixed Media Crepe Paper Rosettes

Image
Hello everyone! Happy St. Patrick's Day! To celebrate the occasion,  I have put together a quick video tutorial, showing you how to add details and accents to your crepe paper rosettes, by using items intended for mixed media projects. I will begin by cutting a long strip of crepe paper (I cut one from pastel rainbow and one teal). By using my finger ,I will fold the crepe paper in a accordion fashion, rotating as I go, to get a full circle design.  Once my rosettes are assembled, I can then add pops of color to edges, but using Distress inks or Distress Oxides along the outer edge. I love the effect this gives. It adds color and texture in a quick way. After blending and smoothing out the distress inks, I can add accent details by using glitter pens, embossing powder or jewels.  No that my main pieces are finished, I can then embellish it by using stickers  or other charms and die cuts to really make the overall themes stand out! I hope you will join me

St. Patrick's Day Tag feat. The Greeting Farm

Image
Hello everyone! I'm here with a fun project, that I'm sharing in my new YouTube channel, fully dedicated to crad making, mixed media and many other fun projects! For today, I wanted to creat a quick and easy project to celebrate St. Patrick's day weekend! I purchased a digital stamp from The Greeting Farm website, that is perfect for such an occasion. I colored my main image using Prismacolor Premiere colored pencils. I find this is a great way to get acquainted with coloring and textures.   I aso love the chalk-y look and feel to the finished image. Once my image is ready and fussy cut, I then took a tag and embossed it with a Darice Four Leaf Clover embossing folder. I added color using the Lucky Clover distressed ink pad, with a blender to smooth it out. I then added some gold accents, by using a Perfect Pearl's kit from Ranger Ink. Makes it easy and quick to add pops of metallic. I added ribbon and my main image, and the tag is finis

Whimsical Fiona |OddBall Art

Image
Hello everyone! Today i wanted to share an entry in my art journal page, using IMG#317 Whimsical Big Eye Girl Fiona  from OddBall Art Stamps. I really wanted for this image to be the focal point, so I printed her to be 4x6, and colored her using my Arteza watercolor brush pens. For the background I used Distress Inks in colors Stormy Sky and Tea Dye. The rose stencil is from a Tim Holtz tag/stencil kit. I hope you've enjoyed taking a look inside my journal page and if it inspired you to create anything, please share it with me on my Instagram account . While visiting the OddBall page,   remember you can use coupon code Eny1 to get one FREE image with the purchase of 2. Happy crafting! Eny ❤

Paper Mug Tutorial

Image
Hello everyone! Todays project includes a full video tutorial, that you can fin on my YouTube Channel.  I created these fun paper mugs, and wanted to share the process with all of you. I begin with a sheet of paper that is 8 1/4 x 4  At th 4 inch side, score at the 1 1/2 inch mark. On the 8 inch side,  score at 1,2,3,4,5,6,7 and 8 inch marks.  Once all your score lines are complete,  you can then add details with paper, stamps, or inks. This is really the fun part and with a holiday theme, it would work great!  You then cut 8 strips or tabs  From the bottom of the paper going only up until the 1 1/2 inch score line.  Adhere tape to 4 of those tabs and bring each tag together in a crisscross pattern,  until you have fully formed the bottom of your mug.  Cut a separate strip of paper 1 x 4 inches. This will be your handle. Place adhesive on top and bottom of strip.  For the top, place adhesive facing you, for the bottom place adhesive facing opposite side. Create