Peek-a-boo Box|Gift Ideas|Packaging Ideas
Hello everyone!
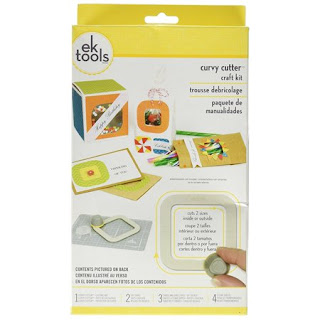
Hope you're having a wonderful week so far! Today I wanted to share a fun box tutorial, that can be made quick and easy using the EK Tools Square Craft Kit , or a single score board and exacto knife will work perfectly.
I began my box base, by laying down a 12x12 patterned cardstock on my score board. I'm then going to score at the 4" mark, rotating my paper, making sure I scored every side.
Next, I decided to completely remove each ot the for corners of the paper. Following along the score lines. Once that's finished, I can lay my paper upside down, and using the EK Tools Square Kit, I will cut a window on each of the remaining for "flaps"
The kit includes clear backing paper, with adhesive, making it even easier to apply, so I can achieve the desired peek-a-boo look. Now comes the fun part, decoration each side of the box!
Once all the main details are adhered, i can proceed to create the lid. You will need a 6.25x 6.25 piece of paper. That yy scre at a 1" on each side.
Fold all scored sides and then cut on a notch on each corner. This will provide the flaps needed to create the lid.
You can then decorate the lod to match the rest of the box, or leave it simple! This box was so quick and easy to make! Perfect for a alternative to Easter baskets or birthday gifts.
I hope you will join me on YouTube for the full tutorial.
Happy crafting,
Eny ❤
Hope you're having a wonderful week so far! Today I wanted to share a fun box tutorial, that can be made quick and easy using the EK Tools Square Craft Kit , or a single score board and exacto knife will work perfectly.
I began my box base, by laying down a 12x12 patterned cardstock on my score board. I'm then going to score at the 4" mark, rotating my paper, making sure I scored every side.
Next, I decided to completely remove each ot the for corners of the paper. Following along the score lines. Once that's finished, I can lay my paper upside down, and using the EK Tools Square Kit, I will cut a window on each of the remaining for "flaps"
The kit includes clear backing paper, with adhesive, making it even easier to apply, so I can achieve the desired peek-a-boo look. Now comes the fun part, decoration each side of the box!
Once all the main details are adhered, i can proceed to create the lid. You will need a 6.25x 6.25 piece of paper. That yy scre at a 1" on each side.
Fold all scored sides and then cut on a notch on each corner. This will provide the flaps needed to create the lid.
I hope you will join me on YouTube for the full tutorial.
Happy crafting,
Eny ❤


Pretty. I'll have to make some.
ReplyDelete