Eny/His and Hers Cards/Altenew AECP Level 1 Final Challenge
Hello everyone,
I am on the final challenge for the Altenew Educators Certification Program Level 1 classes, and I'm so excited to share what I've learned with you. For the challenge we had to choose 3 techniques previously learned in the classes, to create one set of masculine cards and one set of feminine cards. I chose:
1- Clean and Simple Boutique Cards
2- All About Layers 1
3 - Celebration: Stencil Techniques
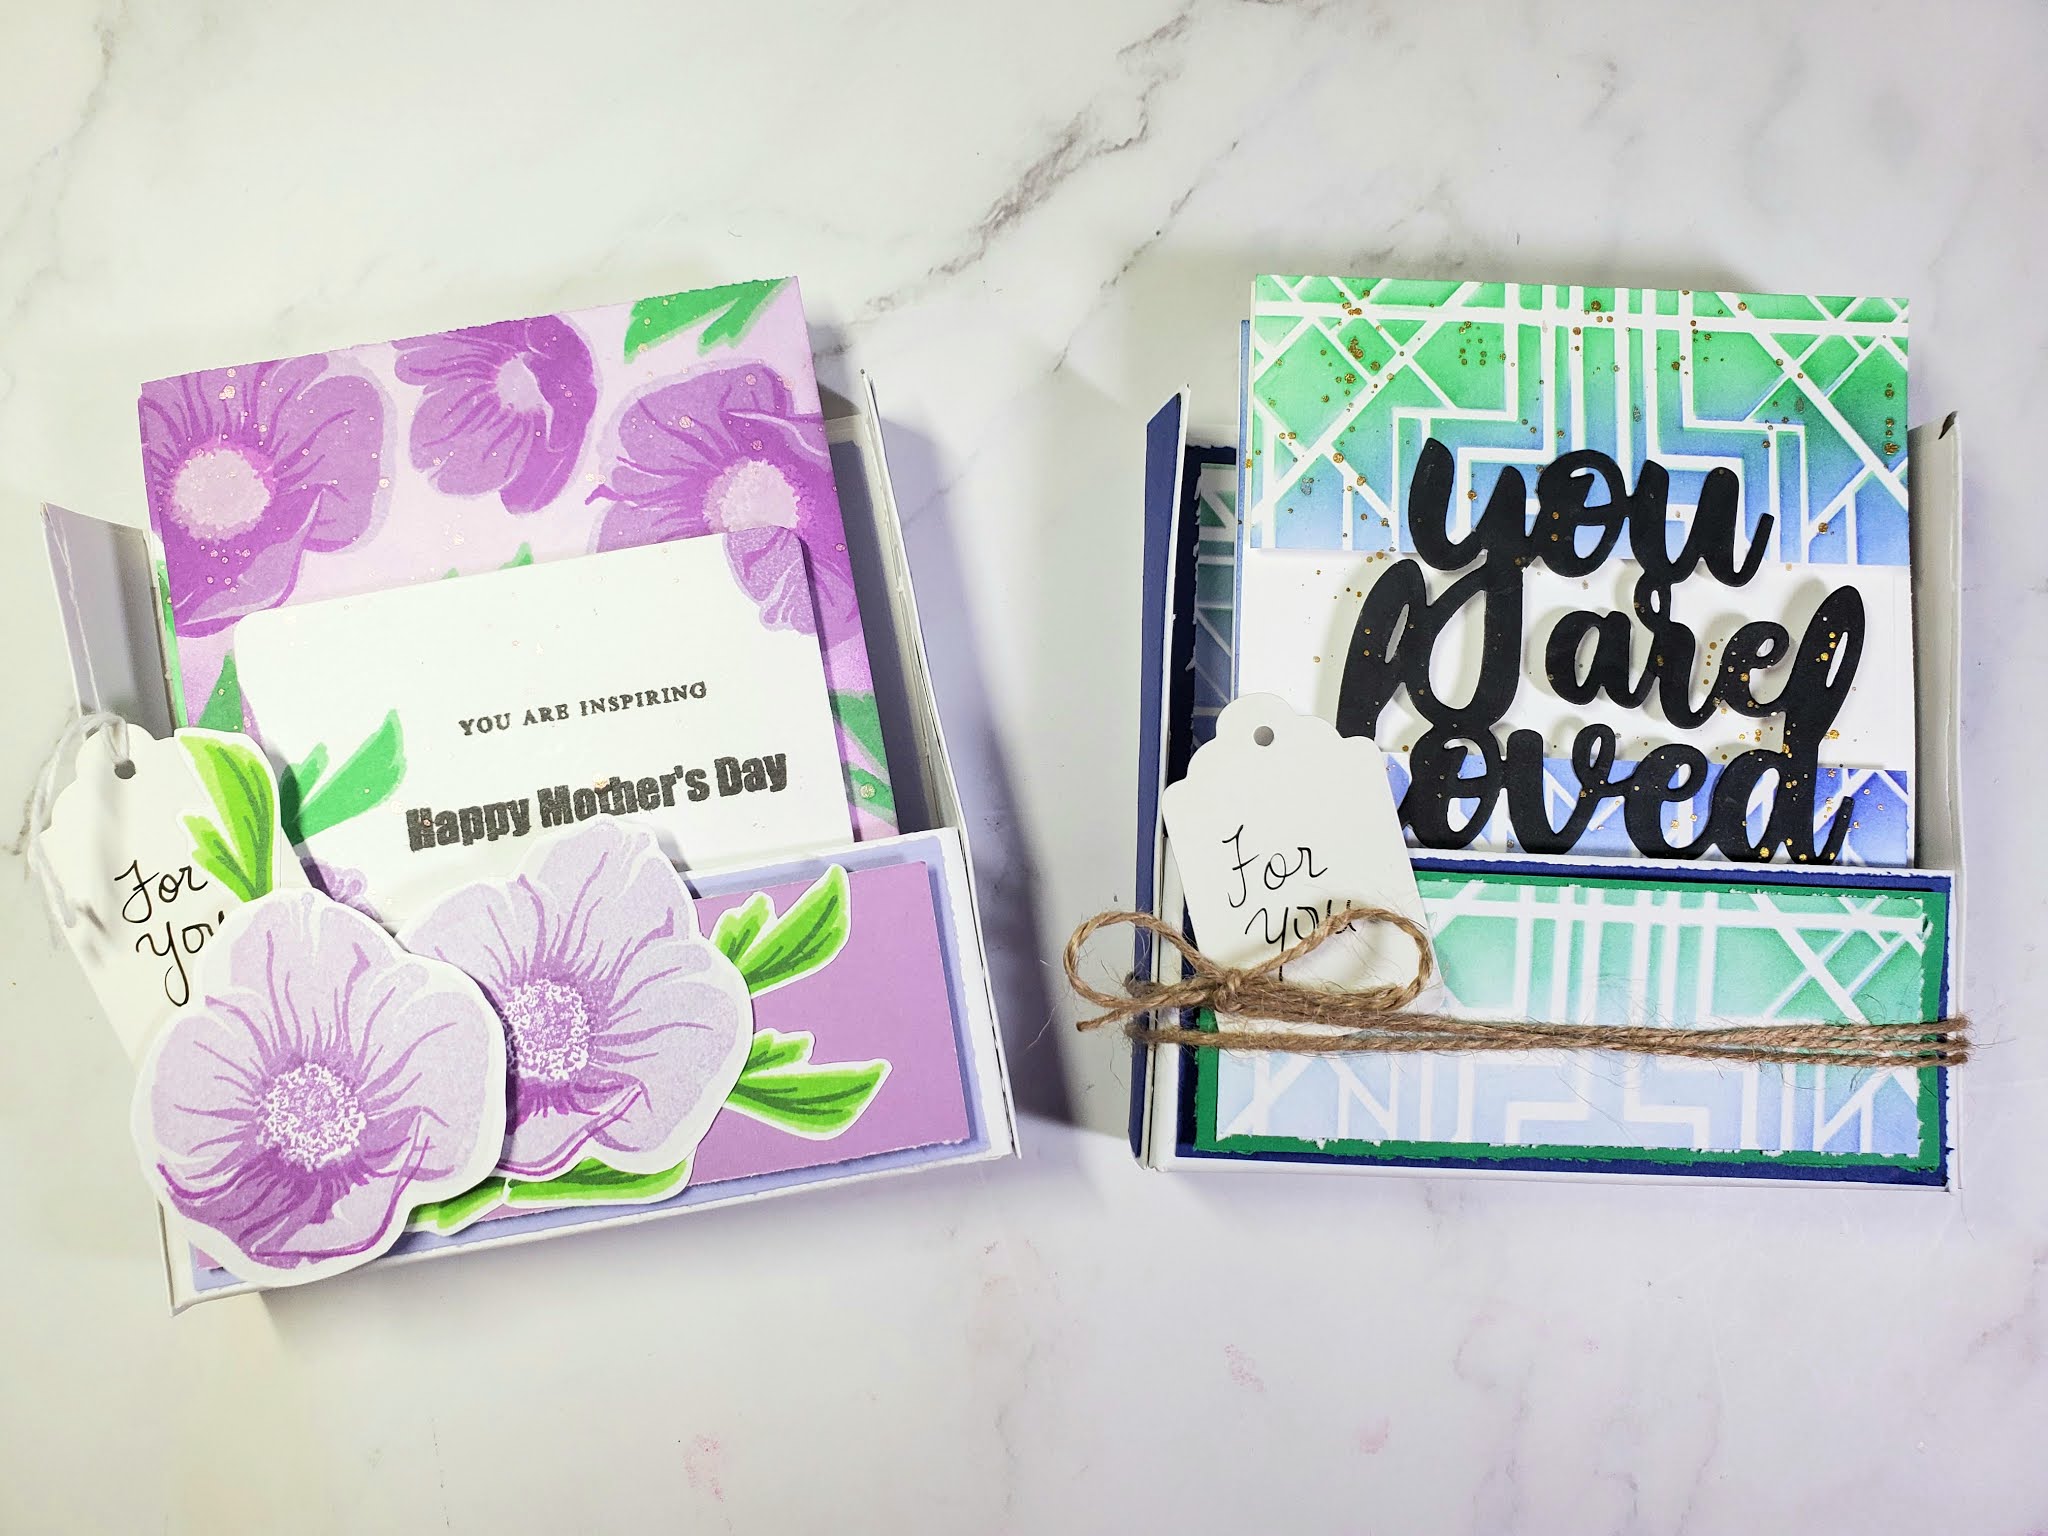
For My cards, I took inspiration from the two most important people in my life (aside from my children), my husband and my mother. For my masculine cards I wanted to make a set of Valentines cards and for my feminine set, mothers day cards. I will say, that finding cards for a man, can be a little difficult, so being able to make something I know my husband will love, was a true treat. I wanted to create simple, clean, elegant cards, and I think I pulled it off.


Creating card sets can seem daunting and exhaustive, but I have a few tips that might help in the process:
1- Plan Ahead
Create your designs on paper, gather all your items, and organize. Mass producing is all about having the right items and set plan, so its easier to "get done". You want to take the time to create a clear design for each card, to make sure it's cohesive.
2- Pick Your Color Theme
Once you have a color combo/family , the making process can be infinitely easier. I have struggled so many times in the past, because I didn't pick my colors before creating. You can find inspiration from Pantone colors, magazines, Pinterest and so much more. See what works best with your design, or for the person you're making the gift.
3- Pick all Stamps, Dies, Cardstocks and Inks
Once the design process is complete, you can then choose all items you want to use. Gather all, and see which ones work best for your project. Since I was creating two very different themes, I had to assemble my items by each particular theme. This will help to have a clear view of what needs/can be created first (stencil background, ink blending, etc) to make the process more efficient.


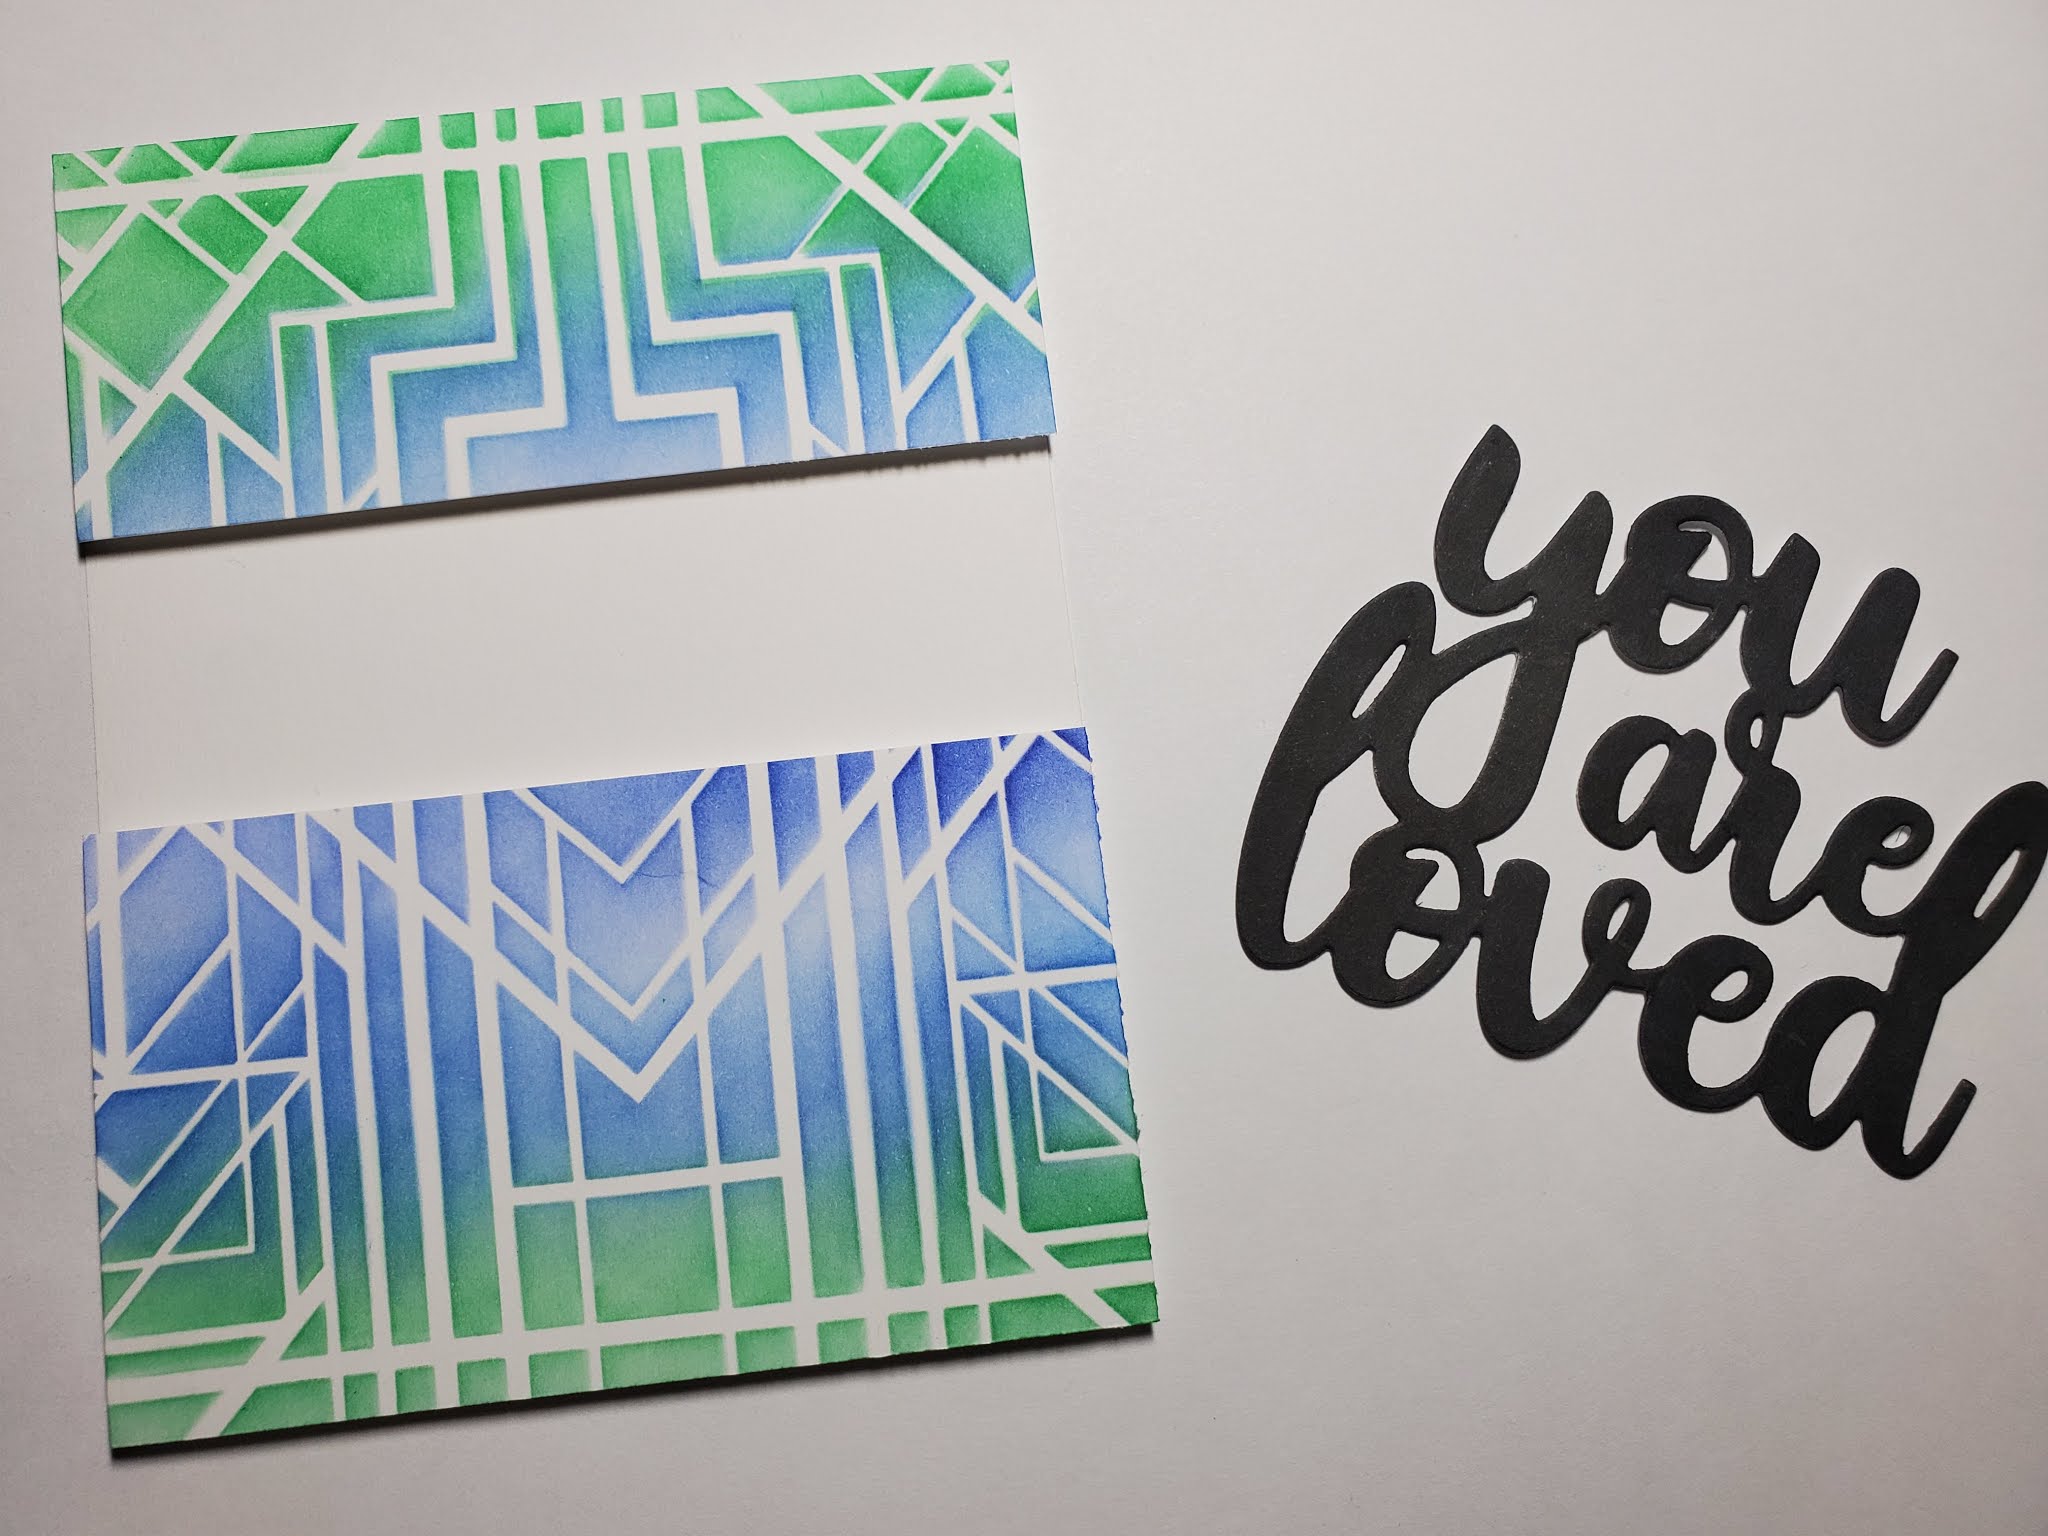
For my stamps I used Aletnew Build-A-Flower: Hellebore (for the feminine cards) and sentiments from Build-A-Flower: Morning Glory (for the feminine cards), Deco Wonder Stencil, Half Tone Hello Stamp Set, and Sentiment Strips Stamp Set (for the masculine cards. For my ink I used Crisp Dye Inks in colors Deep Iris, Soft Lilac, Lavender Fields and Midnight Violet, Sweet Leaf, Just Green and Mountain Pine, for my feminine cards; Caribbean Sky, Persian Blue, Sapphire and Just Green, for the masculine cards.
I used several dies including Altenew Rounded Rectangles and You are Loved Die Set. I also used a Sizzix Circle and heart die sets, for two of my cards.
4- Do All Stamping and Die Cutting at Once.
Depending on your overall designs, stamping and creating diecuts all in one shot, will not only save time, but will make the process easier. Gather all your items, and prep everything you will need ahead of time, so assembling will be a breeze.
Masculine Cards
Now I will walk you through my card making process for each set. I will begin with the masculine cards. I have to say, once I picked the colors, everything became much easier and clearer.
I began by trimming all my cardstock (down to a A2 size), and cresting my stencil background. I used various angles, positions and sides from the stencil, to create different looks. They are very subtle , as to not take away from the overall look. This is where the Celebration Stencil Techniques class came in handy. There are so many ways to get use out of stencils for any project, and sometimes simple is better.

I began my masculine cards, by creating two different diagonal looks. The first, was paired with some hand traced circles, to give a little extra depth. and finished with a simple sentiment, backed with black cardstock (I do this for all my sentiments in this set.


For the second diagonal card, I created a blue background to place my stencil piece on top. I love doing this to create a bit of a color block and add extra details. In the process of creating these cards, I realized it was a bit too monochromatic , so I decided to add a bit of green to the corners or sides, just to cut the monotonous look.


For my next two cards, I created panels out of my stencil backgrounds. One was a 2 x 5.50 inch strip, adhered with foam tape over blue cardstock, and finished with a simple sentiment. The other, I trimmed my stencil background, removing a portion from the middle. One panel will be smaller than the other, and adhered with foam tape one on top of my card base, and one at the bottom. I then adhered the Your Are Loved sentiment. that I cut out of black cardstock. This is one of the simpler cards I made, but I love how it turned out. Creating pop up elements on any project, adds a bit of fun.


For my final card, I wanted to have an interactive element, and decided to make a shaker card. I used the Rounded rectangles die set, to cut 6 sheets of thick cardstock, to create my layers.

I added all my shaker bits and sequins, and using some foam tape, I placed my card base. You want to make sure to use a powder tool to remove the stickiness from the tape. Otherwise, all the bits will stay stuck and wont shake. You can use a piece of acetate or plastic to keep all the bits from falling out. The acetate must be adhered to the front portion of your card before adding the sequins.


I did a bit of ink blending on two separate pieces of card stock, and used a Sizzix heart nesting die set, to create some windows on the center of my cardstock. I made sure I used two different sizes, to create the illusion of a 3D card. The top layer was created with the Deco Wonder stencil, and I also cut a window using one of the larger heart dies. I adhered everything and placed a simple sentiment.

I wanted to add a bit of shine to my cards, and used Ranger Perfect Pearl in gold, with a bit of water, to add splashes all over my cards. It gave them all a little extra touch that was missing, without over powering the whole look.

Feminine Cards
The feminine card sets were truly an ode to my mother. She loves flowers and soft colors, so I wanted to bring that forward for my cards. I began by trimming white Neenah cardstock to an A2 size (4.25x5.50), to have all my card bases ready. I used the Build-A-Flower: Hellebore set (this is where the All About Layers1 class comes in to play) , and began layering all my images. This set, can be somewhat forgiving, if you use very dark colors as you layer each image. I love the different shades of purple, and how much depth it gives to ima overall flower images. For my first two cards, I wanted to create corner pieces. The first was very simple, I stamps all images on one side of the cardstock, and then fussy cut them, leaving a white border, to create the illusion of a die cut being used.


Before adhering my flowers, I stamped some of the leaves included in the set, to add a pop of color. Everything was propped up with foam tape, including the sentiment.
The following card has a ink blended background before any images were stamped. I also included leaves in this, and all other, cards in the full set. I love the combination of purple of green, and the leaves being stamped over the purples inks, gives a nice shaded detail.

This floral panel, was adhered with foam tape over a soft lilac cardstock, and then both adhered to the card base. I decided for this card to stamp my sentiment on top of the card base, versus on a separate piece of paper. (All sentiments used in this set com from the Build-A-Flower: Morning Glory stamp set).

For the next two cards, I used similar techniques to create both, but the end results are very different. I stamped my images on opposite corners of the cardstock and removed the center, by using the second largest die in the Rounded Rectangles die set. I propped up my panel with foam tape


Before placing the panel on my card vase, I made sure to align and stamp my sentiment. The center creates a lovely window for the sentiment.

For my other card, I did a ink blended background, using the same colors i used for the flowers , going from lightest to darkest shade. I then stamped all my images, making sure to alternate between the larger and smaller flowers in the set. Any spaces leftover, I added leaves. This also ties it in with the rest of the cards. I used the pieces that was left over from the previous card, and placed my sentiment on the center. I truly love how this card came out.

For my final card on this set, I also created a shaker card. This time I used a Sizzix circle die, to cut a portion of my cardstock. I placed it on the corner of my paper, but this look can work with any placement. I stamped all images following the circumference of the circle, sort of warpping the flowers around it. and also on the top left corner of my paper. I love adding corner images, it help to create an elegant design.


I followed the same steps as my previous shaker card, only this time, I made sure to also place foam tape around the circle. This helps keep all the bits and sequin in place. I then added my sentiment, that you can see, all were also placed over black cardstock. I finished the set with a sprinkle of Ranger Perfect Pearls in the color Blush.

Packaging
For our final challenge we were tasked to use a recycled element on either the cards themselves or the packaging. I decided to use some 12x12 paper pad covers (from pads that are almost fully used), to create my package.

I trimmed both pieces to measure 7x8 inches, and then I fully covered them with white cardstock.

On the 7 inch side, I scored at 1 inch and 6 inch marks. I then rotated the piece and scored at 5 and 6 inches. I then cut some tabs on the 5 and 6 score marks, folded and creased each section. The two bottom corners, when folded, will be adhered to the inside of the 1 inch sides.


When everything is adhered, you will be left with an Open Box package. For the feminine box, I once again stamped the flowers and leaves in the Build-A-Flower: Hellebore stamp set.

For the masculine box, I used also used the Deco Wonder Stencil.

I used left over scraps of paper, in the respective colors, to fully cover all of my boxes. I then layered all my main components on the front of the box, and included Thank You tags (another recycled element from old packaging). I also added twine to my masculine box. I felt it needed another element, and it brought the whole package together.


Happy crafting,
Eny Dunn

Supply List:
Altenew:
- Build-A-Flower Hellebore stamp set
- Build-A-Flower Morning Glory stamp set
- Deco Wonder Stencil
- Half Tone Hello Stamp Set
- Cris Dye Inks in Colors Deep Iris, Soft Lilac, Lavender Fields, Midnight Violet, Sapphire, Caribbean Sky, Persian Blue, Just Green, and Sweet Leaf.
- Rounded Rectangles Die Set
- You are Loved Die Set
- Sentiment Strips stamp set
Additional supplies:
- Neenah White Cardstock
- Sizzix Circle dies
- Sizzix Heart dies
- Foam Tape
- Liquid glue
-Trimmer
-Scissors
-Acetate Sheets
- Sequins


I applaud you for using one main product to create your card set! Kudos to you! People think that this restricts them but on the contrary, it actually helps you organize your set better! You did a wonderful job at creating these sets. Both the set in their own unique way, are fabulous! You can create both feminine and masculine cards effortlessly! Well done!
ReplyDeleteI especially love the
Thank you for entering your work to the AECP assignment gallery.
Thank you so much! I was so nervous , because I guess, we're always our own worst critic. I truly appreciate the kind words.
Delete